There is a particular kind of pressure that comes with wedding photos and milestone events. Cameras are less forgiving than memory, and if a close-up lip shot is on your shot list, timing and technique matter. Lip filler can be the difference between “nice” and “wow” when it’s done with restraint, tuned to your facial proportions, and scheduled with recovery in mind. I have prepared clients for everything from small courthouse ceremonies to multi-day celebrations, and the best results always come from a plan. If you are considering lip augmentation for a big date, think of it as a project with checkpoints, not a spur of the moment tweak.
What “photo-ready” really means
Photo-ready lips do not look “done.” They hold their shape when you smile, look lip filler near me smooth at rest, and don’t steal attention from your eyes. In high-resolution images, overfilling is obvious. Camera flash exaggerates surface irregularities, and video captures movement that still photos hide. The goal is soft volume that respects your unique lip architecture, combined with clean borders and hydrated texture. For wedding days and events, think subtle lip filler that harmonizes with your teeth, smile width, and philtral columns. The best lip filler is the one you barely notice, except that your lipstick glides on and the photos look effortless.

Start with timing: when to book your lip filler appointment
Event timelines dictate everything. Hyaluronic acid lip filler settles in phases. Even with a smooth technique and a conservative dose, you can expect some swelling and tenderness. Most clients look presentable within 48 to 72 hours, but bridal-level polish is a different standard.
For first time lip filler or if you plan a new shape, schedule your initial lip filler consultation 8 to 12 weeks before the event. This allows enough time for a test run, a staged dose, and a small touch up if needed. If you have had lip injections before and simply want a refresh, 4 to 6 weeks is usually adequate to manage swelling, refine edges, and let the filler integrate before photos.
I avoid last minute appointments for weddings. Two weeks can be fine in experienced hands, but it leaves little margin if you bruise or swell more than expected. If travel is involved or you’re using new skincare, extend your buffer to 6 weeks. Travel itself can worsen swelling due to cabin pressure and sodium-heavy meals.
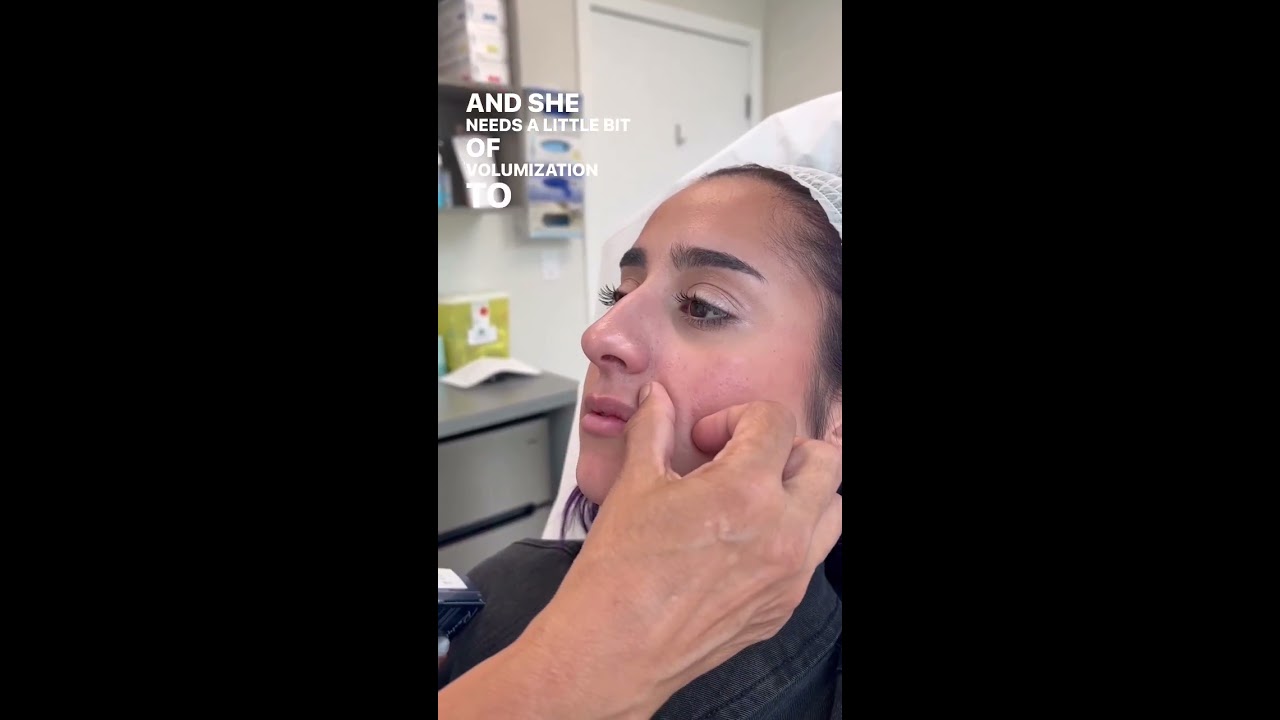
Choosing a provider who treats for the camera
A lip filler specialist who understands lighting and portrait angles makes different decisions than one who only sees lips at rest in a treatment room. Ask to see lip filler before and after images taken in consistent lighting, and look for smiling photos as well as at-rest shots. You want to see animation. A true lip filler clinic should be comfortable talking about focal length, how makeup sits on hydrated lips, and the trade-off between projection and eversion.
Credentials matter, but so does aesthetic judgment. The best lip filler outcomes come from aesthetic lip filler providers who ask questions about your photographer’s style, your lip color for the day, and whether you tend to purse your lips when you smile. When I prepare a client for photos, I look at face shape, nose projection, tooth display, midface support, and how the lower third moves when talking. Those details influence how much volume filler the lips can carry without looking heavy.
Picking the right product: hyaluronic acid lip filler options
Hyaluronic acid lip filler dominates for a reason. It is reversible, predictable, and comes in a range of cohesivities and elasticities that suit different goals. For events, I prefer natural lip filler formulations that give hydration and shine without creating stiffness. Shorter-chain products can act like a hydrating lip filler, improving texture and fine lines rather than pure volume. If you want more presence, a midweight gel can add structure along the vermilion border and subtle plumpness in the body of the lip.
There is no single best lip filler. Some clients need a smooth filler for surface hydration and lipstick bleed control, others need a more elastic gel to support the Cupid’s bow or correct asymmetry. Russian lip filler techniques favor vertical lift and crisp borders, often in small, precise placements. Classic lip filler techniques rely on horizontal threading to enhance overall body and softness. For weddings, a hybrid approach works well: gentle contouring at the border, a few micro-aliquots for lift, and sparing volume in the central third to maintain a natural roll.
How much is enough: dose and shape for event-ready results
The average first session for subtle lip filler ranges from 0.5 to 1.0 mL. If lips are thin or the goal is meaningful change, plan a staged approach: 0.7 to 1.0 mL in session one, then a 0.3 to 0.5 mL lip filler touch up after 3 to 6 weeks to perfect shape. Staging helps the tissue adapt, reduces swelling risk, and improves control. It also allows your provider to see how your lips move on video and in makeup before final refinements.
Shape decisions matter more than numbers. For photo-ready balance, many faces benefit from a slight lower lip dominance with a 1:1.6 ratio between the upper and lower lip heights. The upper lip can be gently everted, not projected forward too much. Over-projecting creates shadows in side profiles and can flatten your smile in photos. The central tubercles should look soft, not pointy. Tiny asymmetries are normal; complete symmetry can look sterile under a lens.
Costs, value, and avoiding false economies
Lip filler cost varies by region, product, and the lip filler provider’s expertise. Expect a lip filler price per syringe in the range of a few hundred to a thousand dollars depending on your market. Affordable lip filler is not necessarily bad, but be cautious if the price seems out of step with local norms. Reputable medical lip filler practices invest in safety protocols, quality products, and time for conservative work. A staged plan might involve two visits and a follow-up, and that time is worth budgeting for.
Clients sometimes ask about “just a little” to stretch a budget. Tiny amounts can freshen texture and control lipstick bleed, but if your lips are very thin or asymmetrical, underfilling leads to no visible change. If cost is a constraint, prioritize a smaller but expertly planned session and skip adjacent procedures that you do not need. If you are searching “lip filler near me,” vet the clinic’s experience with event prep. A provider comfortable with wedding timelines will give realistic expectations and honest advice.
The lip filler process, step by step
Your lip filler appointment should start with assessment, not a syringe. A thorough lip filler consultation includes medical history, discussion of cold sore risk, review of previous lip filler sessions, and a realistic plan for downtime. Photos are taken at rest, smiling, and talking. Your provider may mark borders and asymmetries. Numbing can be topical for 15 to 30 minutes, or a dental block if you are anxious about lip filler pain. Many modern dermal lip fillers contain lidocaine for comfort.
Active technique depends on your anatomy. I often use a needle for precise border definition and a cannula for the body to reduce bruising. Microdroplet placement helps avoid lumps. Expect light pressure rather than sharp pain. Most sessions take 15 to 30 minutes after numbing. After the lip filler injections, your provider will massage as needed and review aftercare. You may leave with mild swelling and pinpoint redness. Plan a quiet evening.
What to expect in the first week: lip filler recovery and swelling curve
Swelling peaks in the first 24 to 48 hours. Upper lips swell more than lowers, and mornings are puffier than evenings. Lips can look uneven early on due to natural asymmetries and how swelling distributes. Bruising varies. Non-smokers, those who avoid blood thinners, and those with gentler techniques tend to bruise less. By day 3 or 4, most of the ballooning resolves, but fine tuning in the mirror should wait a full two weeks. Lip filler downtime for social comfort is often 2 to 3 days, but this is not the same as photo-ready. For events, let the filler settle for at least 3 to 4 weeks if possible.
If you have a history of cold sores, ask about prophylactic antivirals. Trauma from injections can trigger outbreaks. Do not skip this step if you are prone, especially before a wedding.
Aftercare that actually matters
Immediate aftercare is simple: avoid heavy exercise, alcohol, and heat for 24 hours. Sleep elevated the first night to reduce swelling. Skip lip exfoliation and active acids for a week. Do not press or mold aggressively at home; you can move product and create irregularities. Keep lips clean. Use a bland balm while healing. Makeup is fine the next day if the skin is intact, but use clean brushes.
Hydration helps. Hyaluronic acid draws water, and well-hydrated tissue looks smoother. Keep salt intake moderate the first few days. Arnica can help with bruising, though evidence is mixed. Light, cool compresses can soothe. If a lump persists after two weeks, check with your provider. Most small bumps soften as the filler integrates.
Safety, risks, and how to stack the odds in your favor
Lip filler safety hinges on anatomy knowledge, sterile technique, and conservative dosing. Temporary lip filler with hyaluronic acid has an excellent safety profile when performed by a trained clinician, but no procedure is risk-free. Common lip filler side effects include swelling, bruising, tenderness, and mild asymmetry. Less common issues include delayed swelling, nodules, and hypersensitivity. The rare but serious risk is vascular occlusion, which can compromise blood flow. The best defense is an experienced injector who recognizes early warning signs and has hyaluronidase on hand to dissolve filler if needed.
If anything feels severely painful during injection, alert your provider immediately. After you leave, watch for escalating pain, blanching, or dusky skin. These require urgent evaluation. Legitimate lip filler clinics provide clear after-hours instructions. If a price is suspiciously low or if you are asked to bring your own product, walk away.
Planning for makeup and photography
Work backward from your event look. If you favor matte lipstick, you need a smooth lip surface and clear borders to prevent feathering. A soft filler adds a gentle plumpness that makes matte formulas more forgiving. If you prefer gloss, slight eversion in the upper lip catches light beautifully. Your makeup artist should know you had a lip enhancement. They can adjust lip liner placement, avoid over-drying formulas, and use lip treatments that do not irritate healing tissue.
Photographers know that lips lose volume on camera. Gentle shaping holds its definition under bright lights and long lenses. During trials, take test photos in natural light and with flash. Record short videos while speaking, sipping water, and smiling. Movement reveals whether filler remains supple. If your lip corners turn down when you smile, minimal support at the oral commissures can stop lipstick from gathering there, a small tweak with outsized photo benefits.
Technique choices: Russian lip filler or classic shaping
Both Russian and classic techniques can look refined when adapted to your anatomy. Russian lip filler emphasizes vertical columns that lift the Cupid’s bow and create a heart-shaped contour. It suits clients with adequate lip width who want a more defined upper lip but can risk stiffness if overdone. Classic lip filler relies on horizontal threads and microboluses to increase body and roll. It tends to feel soft and move well with speech.
For event prep, many clients do best with a hybrid. A faint outline along the vermilion border improves definition for lipstick. Tiny vertical support at the peaks of the Cupid’s bow refines shape. A few microdroplets across the lower lip restore bounce and even reflection. Avoid heavy lateral filler near the oral commissures unless needed for structural support; it can widen the smile in photos but may weigh down animation.
Special scenarios: thin lips, asymmetry, and previous filler
Lip filler for thin lips is a marathon, not a sprint. Tissue stretch is limited. Expect two or three sessions spaced several weeks apart to build a believable shape. In photos, thin lips benefit from gentle eversion and a bit of central height rather than aggressive projection. Lip filler for small lips must respect face width. Overfilling a petite mouth makes it look borrowed from another face.
Lip filler for asymmetrical lips needs strategy. Most asymmetries stem from dental support, muscle pull, or past filler. A skilled injector will underfill the dominant side and support the weaker side with precise placement, then reassess after two weeks. If you carry old filler, massaging and waiting may not fix unevenness. Hyaluronidase can dissolve residual product, followed by a careful refill. It sounds like extra work, but camera lenses make old irregularities obvious.
Longevity, maintenance, and planning beyond the event
Hyaluronic acid lip filler longevity varies. Expect an average of 6 to 12 months for most products, with lighter gels on the shorter end and denser gels lasting longer. Movement speeds metabolism. If you love your event look, schedule a follow-up 6 to 9 months later to maintain shape with a smaller dose. Maintenance is almost always less product than the first build. If you prefer your pre-event lips, let the filler fade and revisit for special occasions.
Lifestyle factors matter. High-intensity exercise, fast metabolism, and frequent sun exposure can shorten duration. Good skincare around the mouth, sunscreen, and staying hydrated support results. Some clients like periodic “hydrating lip filler” microtouches every 3 to 4 months just for texture; others prefer a single annual session. Either plan is fine if it fits your budget and look.
Pain, comfort, and realistic expectations
Despite scary videos, most clients describe lip filler pain as a stingy pressure, made tolerable by topical numbing and lidocaine in the product. A dental block makes it almost painless, though it temporarily alters lip movement, which can affect real-time assessment. If you are needle-sensitive, ask about pre-appointment icing and distraction techniques. Simple tools like vibration can blunt discomfort.
Set expectations ahead of the wedding week. Even with smooth filler, dry winter air, spicy foods, or a new lip mask can irritate the surface. Trial your lipstick, liner, and balm two weeks before the event to avoid surprises. Bring a small kit on the day: liner, lipstick, a clean brush, and a non-menthol balm. Drink water. If you are wearing a bold color, a slightly overdrawn line at the outer third can balance fullness without depending solely on filler.
When lip filler alternatives make more sense
Not everyone needs needles for photo-ready lips. Non surgical lip enhancement can include topical lip plumpers for a day-of boost, lip scrubs for flaky texture, and medical-grade lip hydrators that improve fine lines over weeks. Laser resurfacing and microneedling around the mouth can soften vertical lip lines if your primary concern is texture, not volume. For clients wary of injectables or those who bruise easily, these options can carry you through an event.
For true volume in a predictable way, injectable lip filler remains unmatched. Surgical lip lift is an option for select clients with elongated white lip and poor tooth show, but that is a longer recovery and not an event-week solution. If you are a first time lip filler candidate with a tight timeline, a conservative microdose simply for hydration might be the right compromise.
Crafting a personalized event plan
Every face, every timeline, and every camera setup is different. I sketch event plans in three arcs: preparation, refinement, and preservation. Preparation includes skincare, dental cleanings, and lip health. Refinement covers the core lip filler procedure, shaping, and a lip filler touch up if needed. Preservation involves aftercare that maintains moisture and minimizes irritation leading up to the event. A well-run lip filler clinic will sequence these pieces around dress fittings, makeup trials, and travel.
If you need numbers, a typical staged plan for a wedding might look like this: consultation at 10 to 12 weeks out, first lip filler session at 8 to 10 weeks with 0.7 to 1.0 mL of hyaluronic acid lip filler tuned for hydration and shape, review at 3 weeks, optional touch up of 0.2 to 0.5 mL at 4 to 6 weeks, final check at 2 weeks before the event, and gentle exfoliation plus lip mask testing in the final week. You would pause retinoids, avoid new actives close to the date, and keep sodium in check the final 48 hours.
Quick planning checklist for stress-free, photo-ready lips
- Book your lip filler consultation 8 to 12 weeks before the event, longer if it is your first time or you have previous filler to manage. Choose a lip filler provider who shows smiling and video results, not just at-rest photos, and who explains lip filler risks and aftercare clearly. Stage conservative doses, aiming for subtle lip filler that suits your facial proportions and your makeup style. Protect your timeline by avoiding alcohol, intense workouts, and new skincare for 24 to 48 hours post-injection, and keep a buffer before travel. Coordinate with your makeup artist for liner placement and formulas that complement hydrated lips, then test your look on camera.
Final thoughts from the treatment chair
Great lip enhancement is less about milliliters and more about restraint, judgment, and timing. For weddings and important events, the camera punishes shortcuts. Build slowly, favor hydration over hardness, and think about how your lips behave when you laugh and speak, not just how they look at rest. If you find yourself scrolling “lip filler near me” late at night, pause and map out the steps instead: consultation, staged treatment, aftercare, camera test. Done this way, dermal lip fillers deliver not only plump and smooth texture, but confidence that holds up under the lens.
And that is the point. You want to forget your lips while you live the moment, then love them later when the photos arrive.